Here was the original problem:
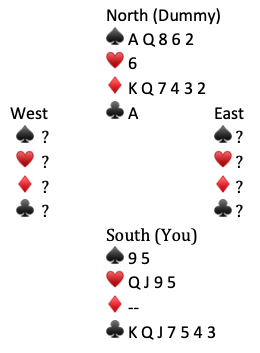
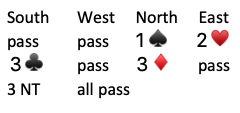
West leads the 2♥️. Dummy plays 6♥️ and East wins K♥️. At trick two East leads 3♥️.
What is your plan?
Solution–
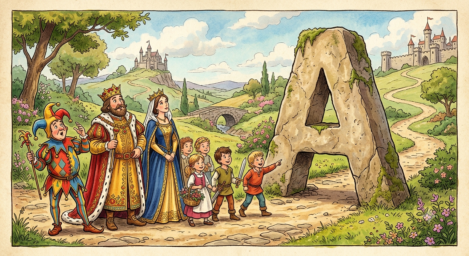
If you can run the ♣️s you might make this hand. However, there are two problems: (1) the only entry to your hand is in ♥️s and (2) the ♣️s are blocked. What this means is that after taking the A♣️ you will be in dummy with no way back to the South hand. [The image at the top of this post shows the club family being blocked by the Ace.]
You will need to rely on the opponents to lead ♥️s for you but the ♣️s can be unblocked on this second ♥️ trick.
At trick two play Q♥️ from your hand and discard A♣️ from dummy. This gives you a chance to make 3NT.
Here was the entire deal:
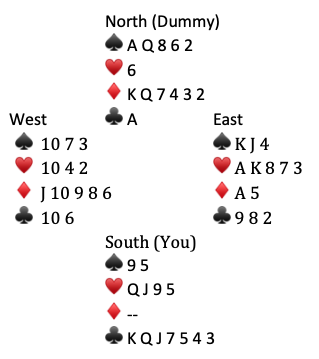
If South plays Q♥️ at trick two and discards Dummy’s A♣️, then declarer will come to nine tricks—seven ♣️s, one ♥️, and one ♠️. The Q♥️ at trick two is superior to the 9♥️ for two reasons: (1) if West had A♥️ and continued the suit then declarer’s 9♥️ would be a tenth trick and (2) if West does not have the A♥️ then declarer does not need any further help from the defense.
When this hand was played South played 9♥️ at trick two and failed to unblock the A♣️. West won the 10♥️ and continued to clear the ♥️s. North/South were down 3 for -300 and a 7% board. Making 3NT was an 87% board. Big swing for failing to unload an ace.
[For more bridge quizzes click on Bridge Index page.]