
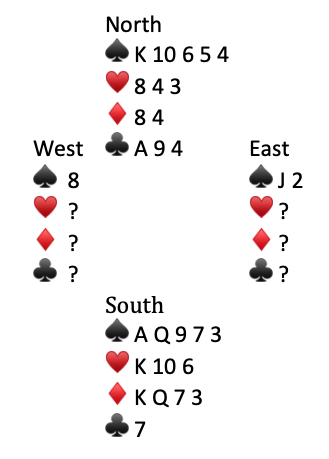
Here was the original problem:
Solution–
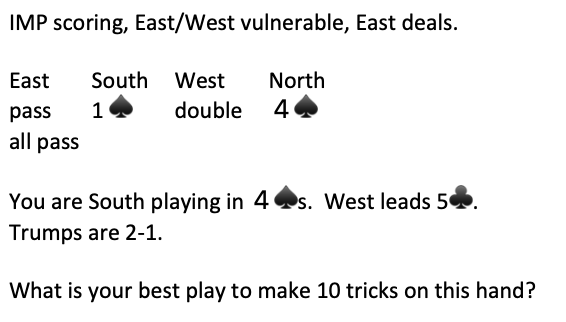
We need to hold our losers to one ♦️ and two ♥️s. Given West’s takeout double, neither red ace is likely to be favorably located. Our best line is to eliminate both ♣️s and ♦️s then stick West with the lead. The ending we are playing for looks like this:
How this ending works for us.
We lead a ♥️ from the North hand. If East plays low we put in the 10♥️ and when West wins, she/he is stuck. West must either lead a ♥️ toward South’s ♥️ K 6 or give declarer a ruff and a sluff. If East plays the J♥️ or Q♥️ on the first ♥️ lead then South covers with the K♥️, West wins with the A♥️, and West is still stuck with either a lead into ♥️ 10 6 or a ruff and a sluff. Regardless of what ♥️ East plays declarer holds his/her ♥️ losers to two. Notice that if declarer leaves a ♣️ in dummy at the time of leading the first ♥️, then West can safely exit with a ♣️ and South will have to lead the second ♥️ from his/her hand.
How we get to the desired ending.
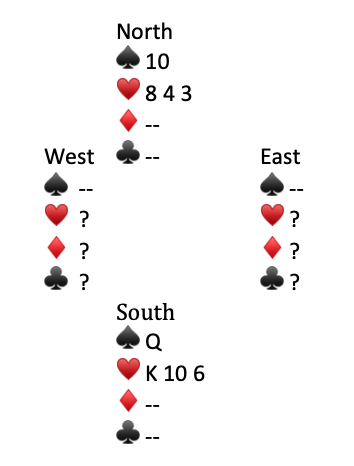
We will have to draw trumps, ruff two ♣️s and two ♦️s, and be in the North hand to start the ♥️s. Ending the cross ruff in the North hand is a bit tricky. Here is the starting position:
Win the opening ♣️ lead and play a ♦️ from the North hand before drawing trumps. This will allow us to draw trumps and start the cross ruff in the proper hand so that we end up in the dummy to lead the first ♥️. If you draw trumps first then West dictates where the cross ruff starts. Here was the entire deal:
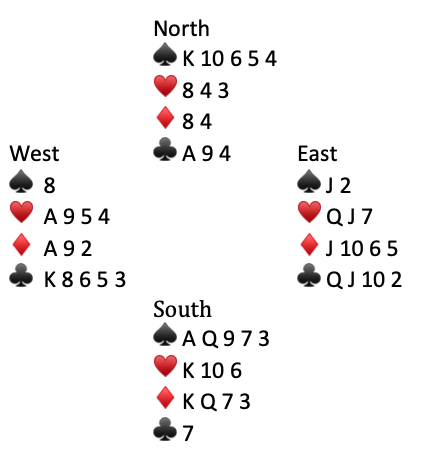
[For more bridge quizzes click on Bridge Index page.]
