
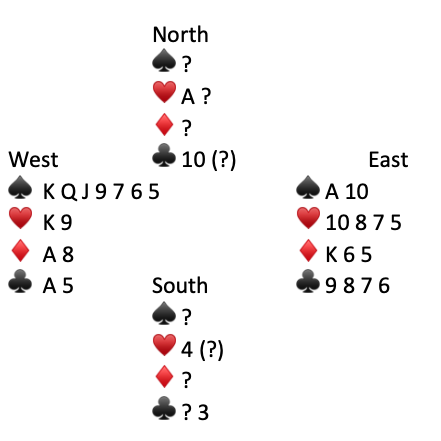
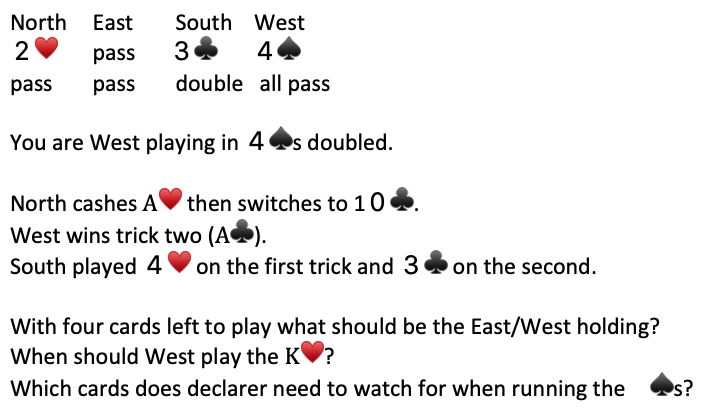
Here was the original problem:
Solution–
North’s 2♥️ opening should be a six card suit, therefore only North can protect ♥️s. The play to the first ♣️ trick looks like the 10♣️ is North’s highest ♣️. That seems reasonable given South’s 3♣️ bid. Therefore only South can protect ♣️s. Add in the ♦️ threat card and we have the makings of a double squeeze. Here is our target ending [West to lead]–

West plays the last trump and North is squeezed. North needs to save the Q♥️ so she/he discards a ♦️. East’s ♥️ threat has done its job, so East discards 10♥️. Now South is squeezed in ♦️s and ♣️s. South saves K♣️ and discards a low ♦️. Both defenders have only two ♦️ left so East/West win the last three ♦️ tricks.
It is important that West plays the K♥️ before playing the last trump. If West still has the K♥️ when the last trump is played he/she may not be able to tell if North has saved ♥️s or ♦️s.
Declarer does not need to keep track of the ♦️s. He/she does need to watch for ♥️ Q J and ♣️ K Q J. If your single threat card becomes good you need to know that. If neither single threat card is good then go for the ♦️s. This is typical in a double squeeze. Here was the entire deal:
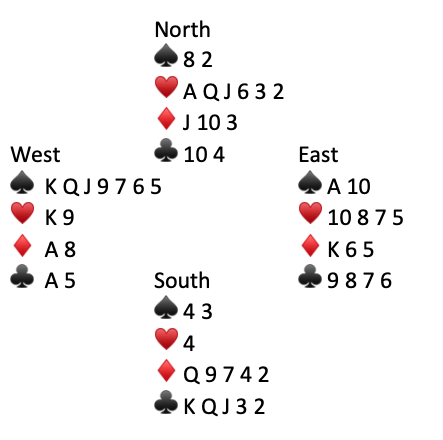
With hindsight a better defense would have been for North to continue with a second ♥️–giving partner a ruff. South then leads a ♣️ to trick three. With this defense there is no squeeze–North keeps Q♥️ and 10♣️ while South keeps three ♦️s. North/South still win 10 tricks–making their contract.
I recommend playing/looking for a squeeze on every hand that you declare. Playing as if there is a squeeze often succeeds even when there is no squeeze. Besides squeeze technique is fun to practice!
[For more bridge quizzes click on Bridge Index page.]