
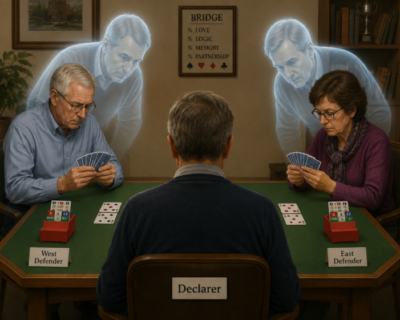
Here was the original (matchpoint) problem:
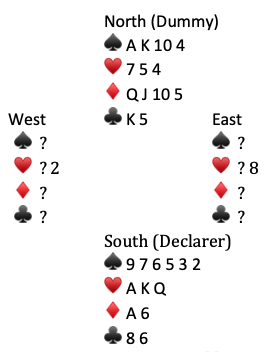
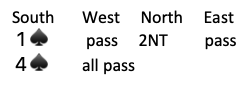
Trick 1: 2♥️(West), 4♥️, 8♥️, A♥️
Now what?
Solution–
We don’t know who has the K♦️. Let’s start with Declarer’s view of East’s view:
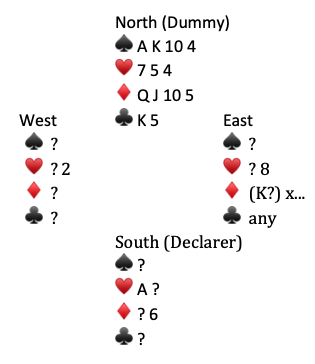

If East wins the K♦️she will almost certainly return a ♥️. Her partner seems likely to have some high ♥️s. And she won’t want to give declarer a free finesse in ♣️s.
————————————————————
Now for Declarer’s view of West’s view:

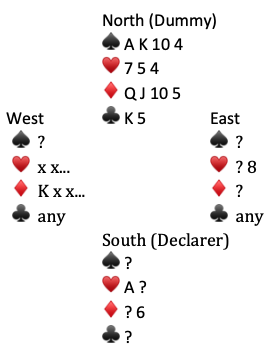
When South leads a small ♦️–West will likely duck because it looks like partner has the A♦️. Even if West does not duck, declarer has lost nothing because the ♦️ finesse was losing anyway.
————————————————————
Conclusion: Declarer should lead a small ♦️ away from his ♦️ A 6.
(1) If East has K♦️: she will return a ♥️. The ♦️s are then set up for ♣️ discards. Declarer wins 12 tricks (if ♠️s are 2-1).
(2) If West has K♦️: he will most likely duck rather than risk setting up partner’s A♦️ to be ruffed by South. Declarer loses no ♦️s.
Either way, leading 6♦️ from the South hand is your best chance for a great matchpoint score. Do it immediately before the defenders figure out what’s going down!
Here was the entire deal:
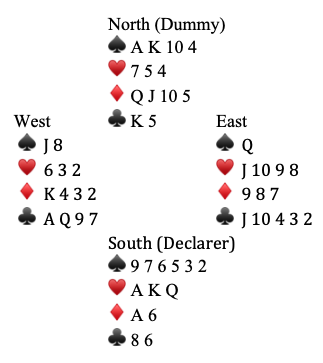
When this hand was played, West ducked the 6♦️ from South. North/South got a top matchpoint score.
[For more bridge quizzes click on Bridge Index page.]
Spade 6 appears two times (West and south hand). Where the Jack S though it does not impact the result.
Good catch John. I think that it is fixed now.